Showing posts with label DIY Ideas. Show all posts

Thursday, October 11, 2012

{DIY Ideas} Mini Succulents: Eco-Friendly, Budget Wedding Decor

Source: Jasmine Star

Growing up, my dad had succulents in the yard of his California home. And he always watered them, which at 10 years old always struck me as odd. Since then, I have had a secret love affair with these strange, wonderful little plants.  They are certainly all the wedding rage these days -- from bouquets and bouts to favors and decor -- mini succulents are popping up on interesting and unexpected places. Another bonus? While succulents are necessarily cultural per se, they do a evoke a sense of desert, dry air, abundant sun found South of the Border. 

Project: DIY Mini Potted Succulents
Mini succulents in aged terracotta pots are eco-friendly, super chic, and make a perfect favor or gift for your guests, centerpiece or as a simple, sweet decor piece. The endurance of the succulent plant is unequaled and will leave guests with a lasting and easy-to-care-for reminder of your wedding -- all they need is good drainage and sun.

Source: My One Sweet Day 
You'll need:
  • Succulents - Go for a variety of different types to add some visual interest. Mini succulents are sold at gardening centers all over the place and are usually reasonably priced.
  • Containers - Mini terracotta pots, small tin pails, or even recycled containers (a great DIY project for used peanut cans) - I found my containers at Family Dollar actually but Home Depot . Your local gardening center (my preference to support local businesses) or craft store will do.  Obviously, make sure the size will fit your plant.
  • Succulent appropriate potting soil 
  • Embellishments - ribbon, note cards, sticks, moss
Source: Santa Barbara Chic
This is a super simple project and a great way to get friends and family members involved in wedding prep.  Try to do this about a week or so ahead of your wedding date, enough time to let the plants take hold in their new home. Make a few extra just in case.

  • Fill your container with potting soil.
  • Transplant succulent to pot - Make sure to water them three times that first day and then once every following day. It sounds like a lot of water for succulents, but they need it when they’re this small.  Keep in an area that allows for drainage, never let them stay in standing water.
  • Add embellishments: Print or write out your message on card stock, fold around stick and glue or tape together, stick in the pot. Add a ribbon in your wedding color around the rim.  You can attach your message to the ribbon or even directly on the container as seen below. Add moss to the top to finish out the look or leave the soil as is.       
Source: The Knot

Source: My Ten Thousand Wedding
 Mason jelly jars are a great choice! Source: Wedding Chicks
If you decide to go with terracotta - my favorite choice, here is a technique for adding that aged look.  It is best to do about a month in advance so give yourself a little time.  
Key ingredient: Yogurt! You will also need a foam brush.

  • Stir yogurt for smooth consistency.
  • Brush yogurt on your pot in generous amounts. It yields more dramatic results when applied to dry pot. For a subtler look, soak the pots in water for 15 minutes first.  For a more natural look, brush on unevenly
  • Set aside in a shaded place until pot achieves the desired look, at least 1 month.

FYI: The yogurt method attract ants (if outside) and will smell bad for the first few days. Place the pot in a location where this will not create a problem. 

What are some other great ways to enjoy succulents at your wedding? Let us a comment and we'll post it on FACEBOOK!

Happy Crafting,

Friday, August 31, 2012

{Guest Post} Oreo-Stuffed Chocolate Chip Cookie Wedding Favor + Free Printable from Marry This!

Edible Wedding Favors never looked or tasted so GOOD!


Hello de Lovely readers! I am Allison, and I blog over at MarryThis! Mellissa and I have been talking about doing a guest post swap for a while now, and I am so excited to finally be here! Today I am sharing with you a fabulous, frugal wedding favor that your guests will be sure to enjoy – Oreo-Stuffed Chocolate Chip Cookies! Hello, serious yum!


With stuffed-cookies being all the rage on Pinterest right now, I thought they would make a perfect wedding favor. Not only are these cookies so easy to make (be sure to check out my baking tip below), but they also came in at less than $1 each! Now, THAT'S something to celebrate.

"It's What's Inside that Counts" Cookie Wedding Favor - How-To and Budget Breakdown


{All project photos via MarryThis!}

Here's what you'll need:
- Pre-baked oreo-stuffed chocolate chip cookies, cooled (my batch yielded 24 cookies)
- Paper sleeves in your choice of color/pattern (I chose yellow chevron)
- Full sheet label paper (to be fed through an inkjet printer)
- Scissors
- Plastic wrap


Project Instructions:
1.    Download your free “It’s What’s Inside that Counts” cookie printable! Add your initials and print on white full-sheet label paper. Never used a MarryThis! customizable printable before? Visit our printing FAQ page to learn how to add your own initials to these labels in Adobe Reader (it’s easy!). Cut out each label and set aside.

2.    Assemble your pre-baked Oreo-stuffed chocolate chip cookies. I followed this recipe. BAKING TIP: The trick to this recipe is to add the correct proportions of cookie dough to the top and bottom of the Oreo. I added about 80% on top and 20% on bottom, which seemed work great. DO NOT add equal amounts of dough on each side unless you want your cookies to look like this. (Hey, in my book, if it tastes good it’s a win!)

3.    After your cookies are fully cooled, wrap each cookie in plastic wrap to give them a longer shelf life and prevent grease from staining the paper sleeves. Place each wrapped cookie UPSIDE DOWN in a paper sleeve. You want the flat surface facing up so the label is easier to adhere.

4.    Fold down the top inch of the sleeve (to make a clean crease), and then fold in half again over the cookie. Adhere label to seal the paper sleeve shut. Viola! It ain’t rocket science, people.
These favors should stay fresh for up to a week (don’t forget to plastic wrap the cookies!). Best of all, these favors are so easy to assemble, you could have a baking party with your bridesmaids and knock out all your favors in one night. 


Budget Breakdown:
- Chevron paper sleeve: .25 cents each
- Label paper: .25 cents per sheet (6 labels to a sheet)
- Cookies: About .30 - .50 cents each, depending on the quality of your ingredients
Grand total per favor: Less than $1 each!
I hope you love these favors as much as I do! (Trust me, you can’t go wrong with cookies!) Send us some photos of your finished wedding favors so we can share with other readers. This is the best kind of inspiration!

Happy Friday!
xo, Allison

P.S Let us know what you think about this awesome recipe and guest post by leaving a comment below. Check out all our other Edible Wedding Favor ideas on PINTEREST!

Allison Doty is a graphic designer in the beautiful city of Boise, Idaho who is obsessed with all things beautiful. She is the founder of Allison Doty Graphic Design and Art Director for Marry This! Allison is an alumnus of Sigma Kappa and Washington State University where she studied Journalism and Fine Art. While Allison wishes she could stick to one hobby she finds herself as more of a hobby collector than an actual hobbyist (recently she has learned to play the ukulele … ish). 

Thursday, August 23, 2012

DIY Painted Votives - A Perfect Project for a Watercolor Wedding

As I said just the other day, the Watercolor Wedding theme will be a hot, hot, hot wedding trend for 2013. From invitations to flowers, centerpieces to favors, the watercolor palette is a super popular choice for couples who want subtle, romantic color and a touch of artsy style. And the bonus is - most wedding items can be done DIY style, like these votive candle holders I found over on Once Wed. It's a relatively easy project to do with a low cost and big impact! I love the look of colorful candlelight.


Photos via Once Wed
This project is versatile - choose any color palette, simple - only three ingredients, and they make a great giveaway to guests.

1. Pick up glass votives from a local craft market, floral wholesaler, or online supplier. I like the idea of using a textured votive holders to add dimension and visual interest.  Luna Bazaar has an awesome selection of candle holders and until August 31st, you can save 5% off your entire order if you use SummerWedding at the checkout! WOOT!
2. Choose a couple of acrylic paint colors and mix with a little water in separate bowls until thin but not too runny.
3. With a paint brush, scribble watery paint on the inside of the glass. You may need a few brushes so that the colors don't run together and look like brown goo. You can let one section dry and then layer another color across the top if that is easier. Remember to leave some clear, see through space.
4. Once dry, add a votive candle and a sweet tag for guests to remember you by.

And voila, an easy peasy DIY wedding project that will make a beautiful impression. I can see this being used for all sort of other celebrations - bridal shower, birthday party, intimate dinner party - anywhere where color and light and DIY can be celebrated!

What some other easy paint projects you can do for your wedding? Please let us know over on FACEBOOK and check out our other Watercolor Wedding ideas on PINTEREST.

Have a lovely day,

Wednesday, August 15, 2012

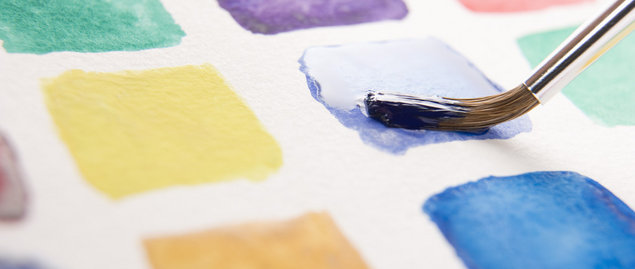
Top 10 Ideas for Your Watercolor Wedding: An Artsy Trend for 2013

Georgia O'Keefe would be absolutely wild over the Watercolor Wedding trend that is emerging for the 2013 wedding season.  Heck, I am giddy as a school girl too! It reminds me of my Great Aunt's paint box; she loved how water diluted the vibrant paint ever so slightly to create a soft muted hue, not too subtle but not off the chroma chart either.

Colorful, soft, and pretty, a watercolor wedding palette allows you to add a brush stroke of style and creativity without it being too overwhelming. I love this theme for artsy couples and brides with an artist's personality - those who loves playing with light and texture and appreciate the subtle nuances of color. Creating watercolor wedding decorations is easier than you think for you DIYers out there - think candles, flowers, tags, and seating arrangements. I've got some great tutorials coming up soon to get you started.

Here are my Top 10 favorite Watercolor Wedding ideas to get excited about:


With a Watercolor Wedding theme, the possibilities are endless, and the beautiful part is that none of it needs to be perfect. Just think of Van Gogh, Cezanne and Andrew Wyeth whose imperfections made them Master Artists of our Times.

What is your favorite idea for using a Watercolor Theme? What other DIY projects would you add to our list?  Pop over to PINTEREST for other great DIY ideas and join the chat on our FACEBOOK fanpage!

Make it colorful,

P.S. This Friday we have an art inspired Real Wedding that you won't want to miss!

Monday, August 6, 2012

{Real Wedding} Eve & Don - DIY Beachside Extravaganza

It's a Shore Thing!


When I think of Budget Wedding Elegance and DIY Extravaganza, it looks exactly like Eve and Don's stunning turquoise and white beachside wedding. Captured by A Million Sighs Photography, Eve and company spent three days transforming a blank venue at Jupiter Beach Resort in Florida into a spectacular affair complete with every DIY wedding project possible. From edible favors to twinkle lights and lanterns, from their unique guest book to a final send off, Eve and Don prove that couples can indeed create a personal, elegant, detail filled wedding on a budget. 


Eve is a radiant bride in her layers of organza but what I love about her most is the playful side that comes through in these images. Elegant, graceful, yet completely herself - how a bride SHOULD be!


Calla Lilies make for a sweet, simple bouquet - unfussy and completely elegant, a perfect compliment to the DIY Budget feel of this seaside affair. This beauty was put together by Botanical Bliss.


Don and the guys look dapper in their white tuxes with a slash of turquoise, perfect for the Florida coast!


Eve chose mismatched bridesmaids gowns for the girls but kept them all the same color, a great trend that shows lots of personality. The wedding party has a cohesive look but different dress styles allows for lots of different body types, complimenting each maid individually.


Eve and Don did a fabulous job of maintaining the color palette throughout their entire celebration - from Eve's hair clip to her dad's bow tie, to the ombre wedding cake to yummy candy bar, table runners, chevron patterned napkins and chinese lanters - all pitched in to create a cohesive wedding look. 


Continuing with their beachside wedding branding, I love their unique guest book - a beautiful wooden surfboard.  A treasured memory for years to come I'm sure!


Floral Designer:  Botanical Bliss
Cake Designer:  Johnson's Custom Cakes
Event Venue:  Jupiter Civic Center

Congratulations Eve and Don - what an amazingly fun and personal wedding celebration! Thank you for letting us share your special day! We wish you good health, happy life, and a wonderful marriage!
Thank you also to the crew over at A Million Sighs Photography for sharing this wedding with us through Two Bright Lights.   

What was your favorite DIY detail of Eve and Don's reception? What DIY ideas are you using for your own big day? We are DYING to know so please leave us a message below.  Also come join the conversation on Facebook and Twitter for more great DIY ideas.

Happy DIYing,

Related Posts Plugin for WordPress, Blogger...