Showing posts with label Once Wed. Show all posts

Thursday, August 23, 2012

DIY Painted Votives - A Perfect Project for a Watercolor Wedding

As I said just the other day, the Watercolor Wedding theme will be a hot, hot, hot wedding trend for 2013. From invitations to flowers, centerpieces to favors, the watercolor palette is a super popular choice for couples who want subtle, romantic color and a touch of artsy style. And the bonus is - most wedding items can be done DIY style, like these votive candle holders I found over on Once Wed. It's a relatively easy project to do with a low cost and big impact! I love the look of colorful candlelight.


Photos via Once Wed
This project is versatile - choose any color palette, simple - only three ingredients, and they make a great giveaway to guests.

1. Pick up glass votives from a local craft market, floral wholesaler, or online supplier. I like the idea of using a textured votive holders to add dimension and visual interest.  Luna Bazaar has an awesome selection of candle holders and until August 31st, you can save 5% off your entire order if you use SummerWedding at the checkout! WOOT!
2. Choose a couple of acrylic paint colors and mix with a little water in separate bowls until thin but not too runny.
3. With a paint brush, scribble watery paint on the inside of the glass. You may need a few brushes so that the colors don't run together and look like brown goo. You can let one section dry and then layer another color across the top if that is easier. Remember to leave some clear, see through space.
4. Once dry, add a votive candle and a sweet tag for guests to remember you by.

And voila, an easy peasy DIY wedding project that will make a beautiful impression. I can see this being used for all sort of other celebrations - bridal shower, birthday party, intimate dinner party - anywhere where color and light and DIY can be celebrated!

What some other easy paint projects you can do for your wedding? Please let us know over on FACEBOOK and check out our other Watercolor Wedding ideas on PINTEREST.

Have a lovely day,

Wednesday, April 6, 2011

{Monday Eye Candy} Part 2, Bahamas Wedding, Harbour Island Happiness

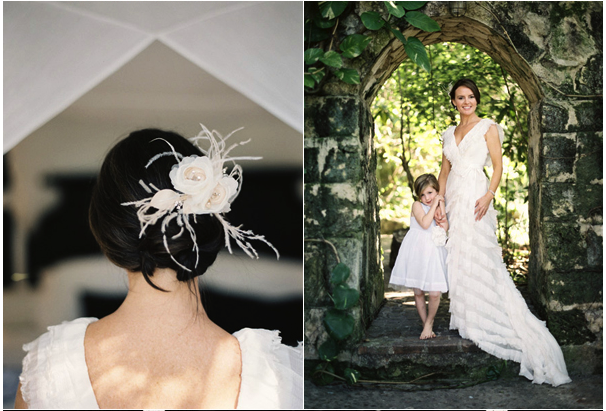
Part Two of Monday's Eye Candy on Wednesday once again brought to you by the lovely folks over at Once Wed.  Thanks to them for originally posting these magnificent photos of this beautiful destination wedding. Hope this makes your day even sweeter! I so {heart} this wedding. 

Credit belongs not to us but to the fine folks below!  
Photography by Jonas Peterson
Planner: Stefanie Cove from Yifat Oren & Associates


Friday: Catering by Little Island Design
Saturday: St. John’s Anglican Church, Reverend Russell and Rev. Paul Rasmussen of Highland Park United Methodist Church – Dallas, Texas
Saturday: Hair and Make up: Karen Catalyn of the Island Spa
Saturday: Cocktail Musicians: Rocky and Ersly
DJ: Daddy D (Devon Sawyer)
Saturday: Florals – Little Island Design

Venues:
Welcome Reception – The Dunmore
Brunch – The Landing
Wedding Reception – Pink Sands
Church – St. John’s Anglican Church
Bridal Breakfast – Ocean View Club


Facebook - You know you want to be a fan
Twitter - Follow us anywhere

Monday, April 4, 2011

{Monday Eye Candy} Part 1, Bahamas Wedding, Harbour Island Happiness

This gorgeous Monday Eye Candy Real Wedding comes to us from Once Wed. We are simply borrowing this goodness to share with you. 

Part 1 of a gorgeous Harbour Island Bahamas wedding...this is some destination. Talk about unwinding before the big day, this couple went to the beach and brought their friends...and a bar...and some couches...and some coconuts cups.  It doesn't get much better.  Hope this brings some sweetness to your day!

Credits: Not us but these fine folks! 
Photography by Jonas Peterson
Planner: Stefanie Cove from Yifat Oren & Associates


Stay turned for Part 2 of the de Lovely destination wedding! I am super in love with these images and I know you will be too! What is your favorite pic? Leave us a comment and let us know!
PS: As always look for us on Facebook and Twitter. I think you should be a fan cause we love you!


Thursday, January 13, 2011

Papel Picado Wedding Invitation - DIY Style

In continuation of our Mexican Wedding inspiration week, here is a super cool project for the creatively inclined....a Papel Picado Invitation I found on Once Wed.  Literally meaning 'punched' or 'perforated' paper, papel picado is a traditional cut paper folk art found throughout Mexico and the former colonies of Spain as well as in the folk traditions of many other countries. 

The invitation DIY project shown here happens to be for a rehearsal dinner/fiesta but I think you could probably use and embellish this idea for any wedding related event needing an invitation. This project is fun, super easy and makes a big impression for the relative ease of construction. So gather your ladies together and spend a day putting these beauties together.
For this project, you will need:

- 4-Bar flat note cards - Paper Source is a great place to purchase the 4 Bar note cards or any size you need for that matter. They are my personal favorite and got me through my own wedding!  You can also cut 4-bar sized cards out of regular letter sheet.  
- Scissors
- Glue stick
- Mini papel picado banners: You can purchase mini banners here. The mini banners typically have 10 sheets. This project calls for 5 per invitation. Another more economical option although time consuming is to actually make your own. Here is a helpful instruction guide and cutting template.


After printing your note card, begin assembling the invitations themselves. If you choose to use these banners, which are ten per strand, simply cut the banners in half, allowing for 5 tissue sheets for each invitation.  Next, place a small line of glue on the same area as the string on the first piece of tissue on the papel picado banner.  Center this piece on the notecards and glue into place.  Repeat for the last piece of your cut banner.

And Voila! Wait, that is French...anyway fold together, one flag on top of another, arranging the two notecards as if it were a bi-fold invitation. Slip in your vellum envelope and mail off the fun!


Project by Denise Mieko Cherry


Have a deLicious Day!
Related Posts Plugin for WordPress, Blogger...